Take a Booking
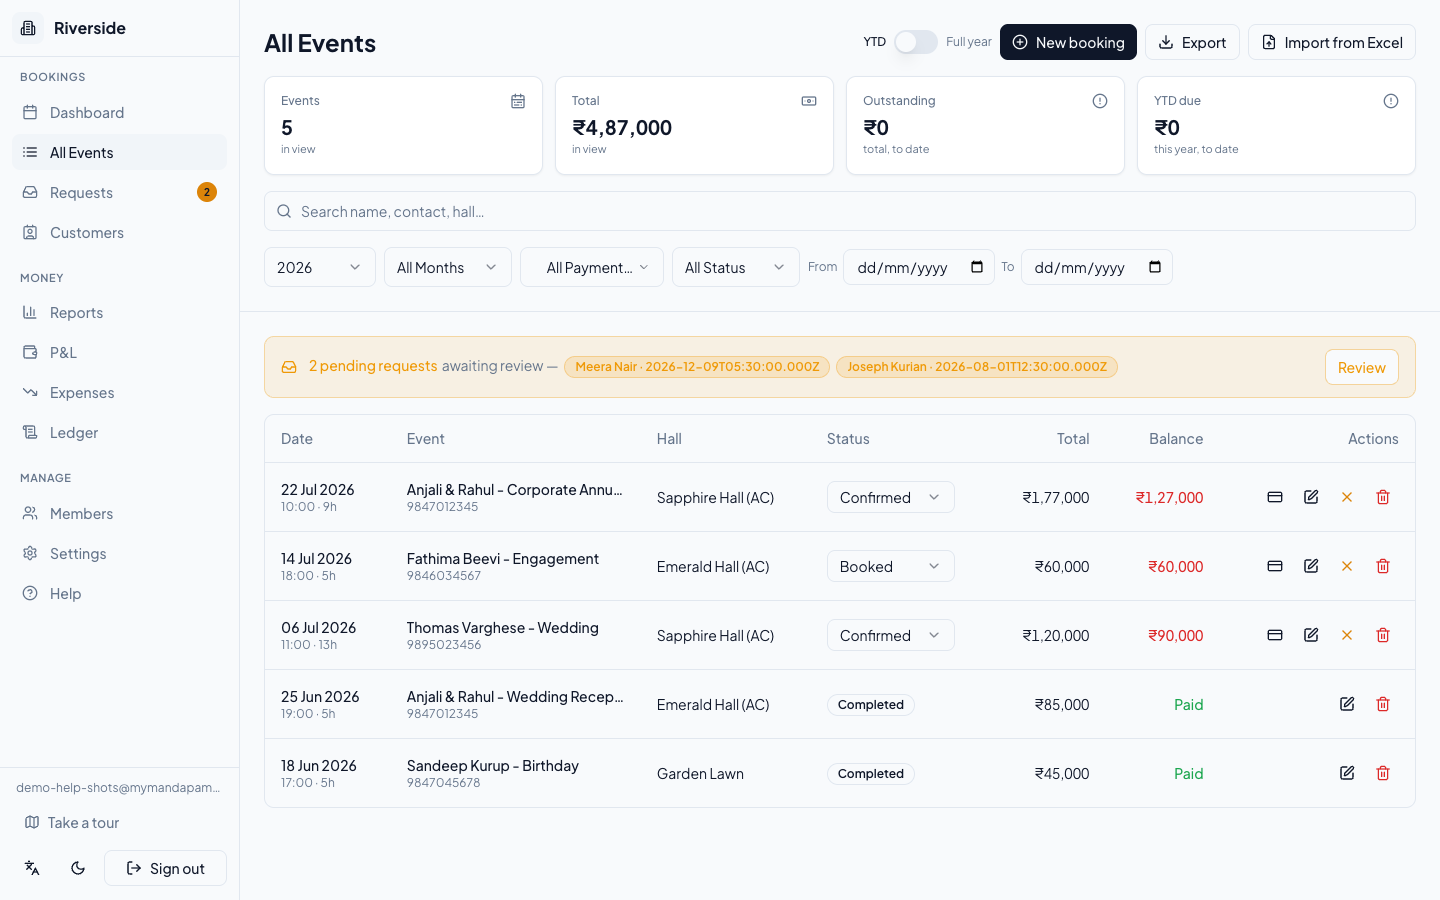
Every booking for your venue is recorded from the All Events page in the operator console. Owner, Admin, and Staff members can all create bookings.
Open the booking form
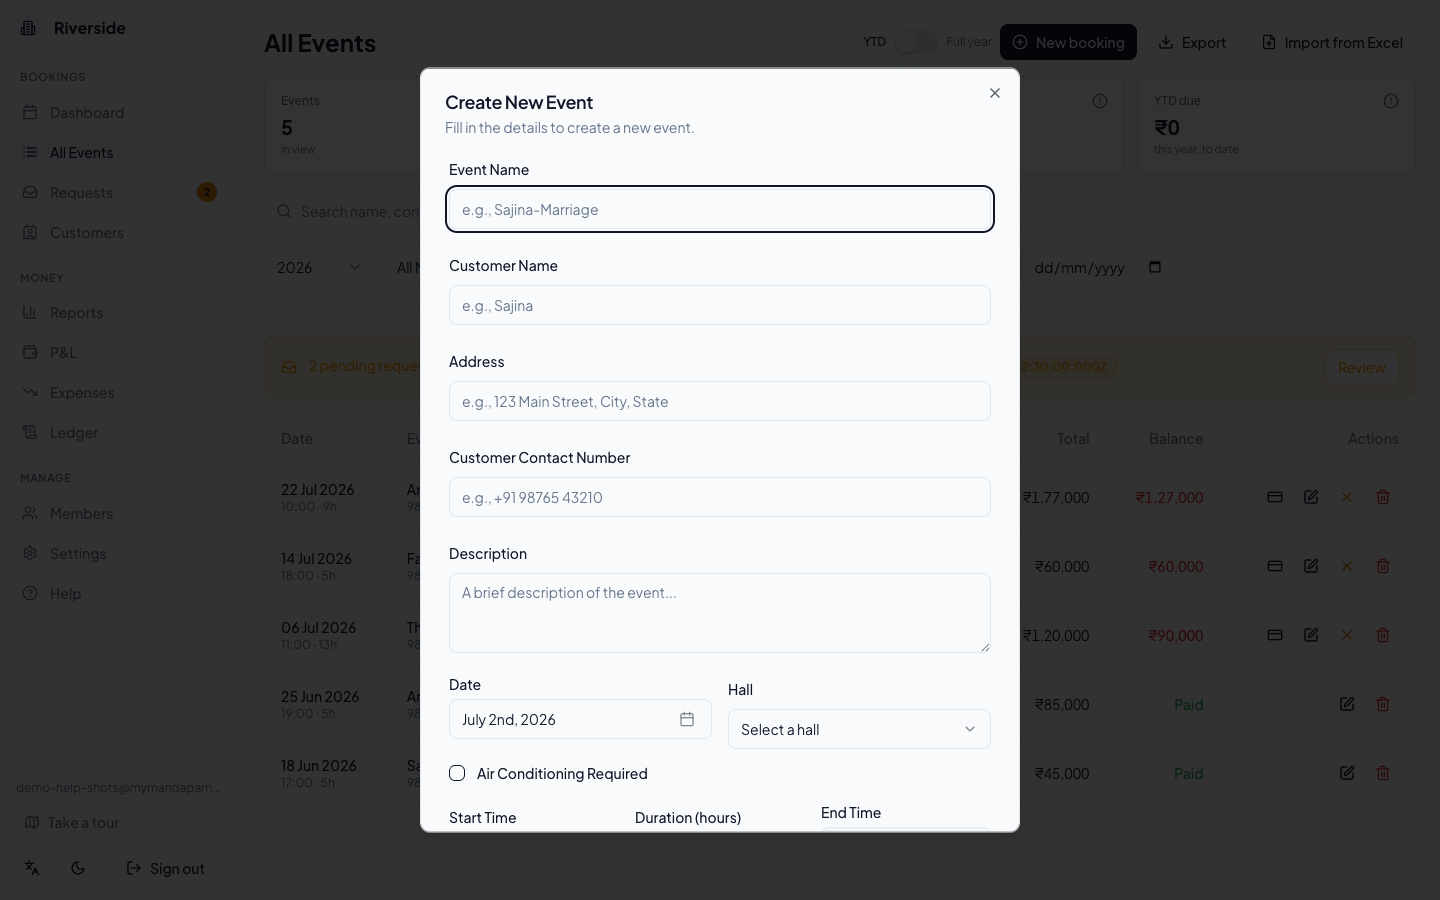
Go to All Events in the left navigation and click New booking in the top-right corner. A dialog slides open titled Create New Event.
Fill in the event details
- Event Name — a short label for the booking, e.g. Sajina-Marriage (at least 3 characters).
- Customer Name — the person making the booking.
- Address — the customer's postal address.
- Customer Contact Number — phone number (at least 10 digits). If the number matches someone already in your contacts, a banner appears — click Use details to fill the name and address automatically.
- Description — optional notes visible to your team.
Set the date, hall, and time
- Date — pick from the date picker (past dates are disabled).
- Hall — choose from the halls configured for your venue.
- Air Conditioning Required — tick if AC is needed for this event.
- Start Time and Duration (hours) — the End Time is calculated and shown automatically.
If that hall is already reserved for any overlapping slot, saving will show a conflict error — adjust the time or choose a different hall.
Enter payment details
In the Payment Details section:
- Total Amount (₹) — the base hall charge for the event.
- Advance Amount (₹) — any deposit collected right now (leave 0 if nothing has been paid yet).
- Additional Charges (₹) — extras such as decoration or catering supplements.
- Balance Amount is calculated automatically (Total + Additional − Advance) and is read-only.
tip: You can record further payments at any time from the events list. See Payments and Receipts.
Add GST (if enabled for your venue)
If GST is turned on in Venue Settings, a GST panel appears below Payment Details:
- Toggle Charging GST on.
- Set the GST rate (%) — defaults to your venue's configured rate.
- Choose Pricing: Add GST on top (exclusive) or GST included (inclusive).
- Use the Tax hall rent and Tax additional charges checkboxes to control which amounts attract GST. The Grand total with CGST and SGST breakdown updates live as you type.
Save and manage
Click Create Event. The booking is saved with status Booked and appears at the top of All Events. From there you can:
- Advance the status to Confirmed or Completed using the inline dropdown.
- Cancel a booking using the × button (this frees the time slot immediately for new bookings).
- Log more payments or download a receipt — see Payments and Receipts.
- Edit any field by clicking the pencil icon, or delete the booking entirely (Owner and Admin).
Have a question about your own venue? Sign in to ask inside your workspace.